
Part of the Process - The Canvas
Building and Stretching the Canvas
Here is a quick overview of how I begin every painting, with building and stretching the canvas.

Before I even begin to tell a story on the canvas, the canvas itself must be created. Instead of beginning the painting process with an already stretched and primed canvas from my local art supply store, I enjoy starting with a completely clean slate. This way, I not only have more control over the weight and stretch of the canvas, but also how it is primed.

First, I fit the corners of the stretcher bars together, to create a stretcher frame at the correct size. I do not generally staple or glue the corners together, as they fit into one another tightly, and there are times when they will need to be adjusted in the future after canvas is added. Cross braces will be needed for any stretcher frame with a bar length of 36” or more. I use this basic cross brace reference guide when building my stretcher frames.

Once I know my stretcher frame is square, I begin to prepare my canvas. For my larger pieces, I will typically use 12 oz unprimed cotton canvas with a uniform or medium texture. It is less expensive to order my canvas in folded sheets, which I will then unfold, iron, and roll.

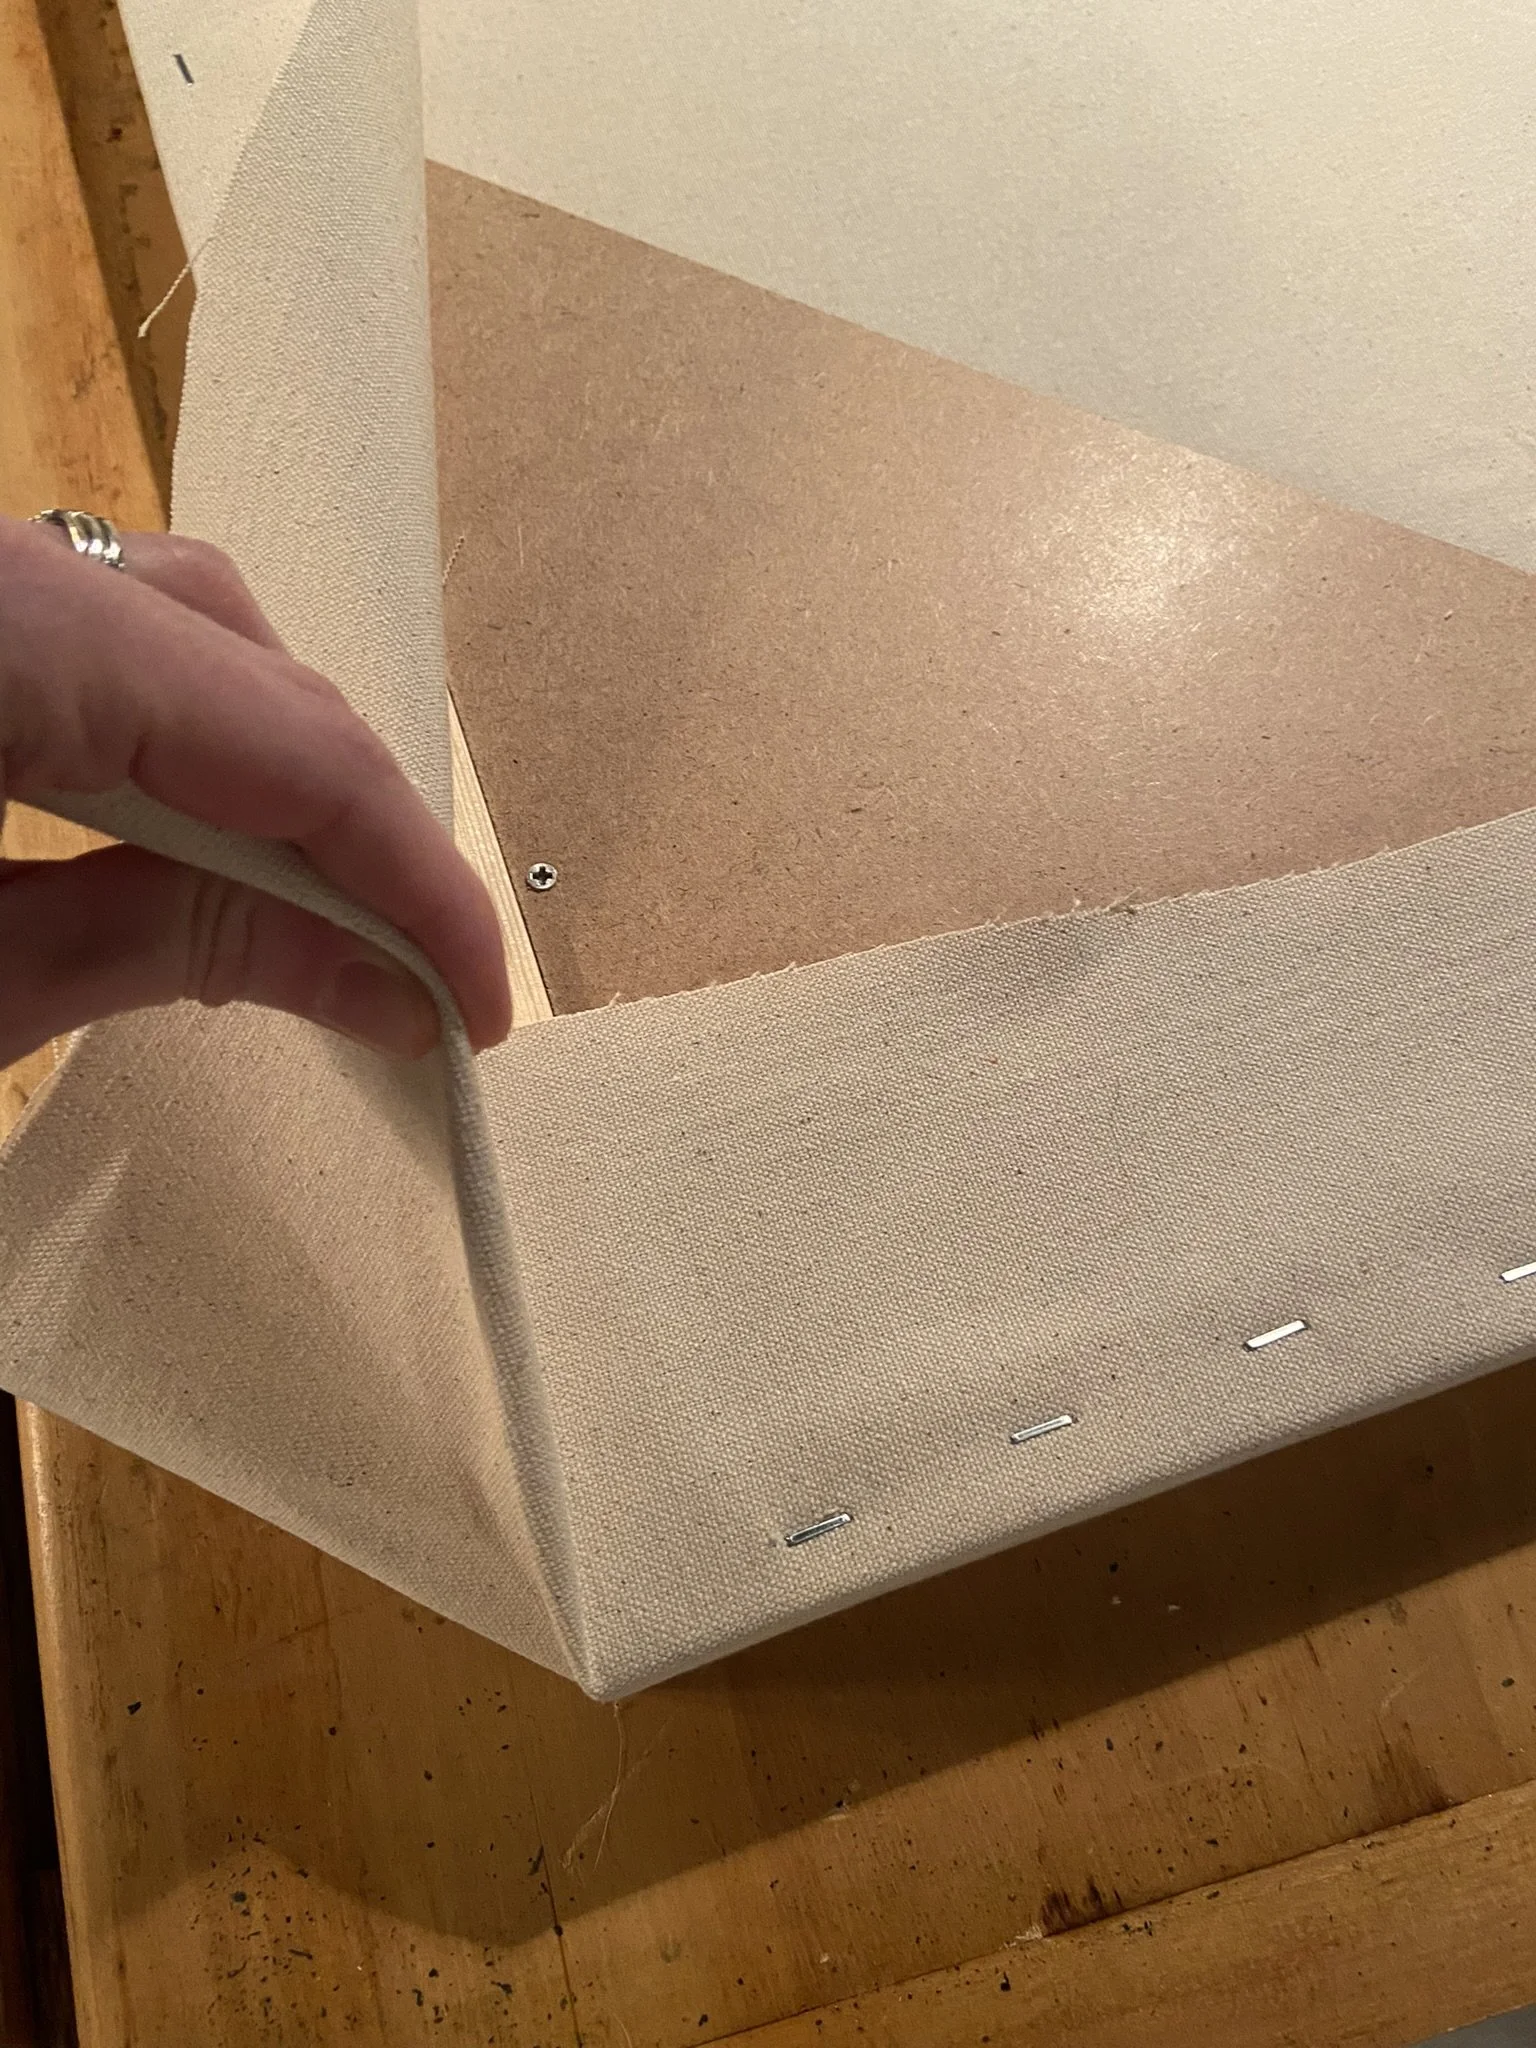
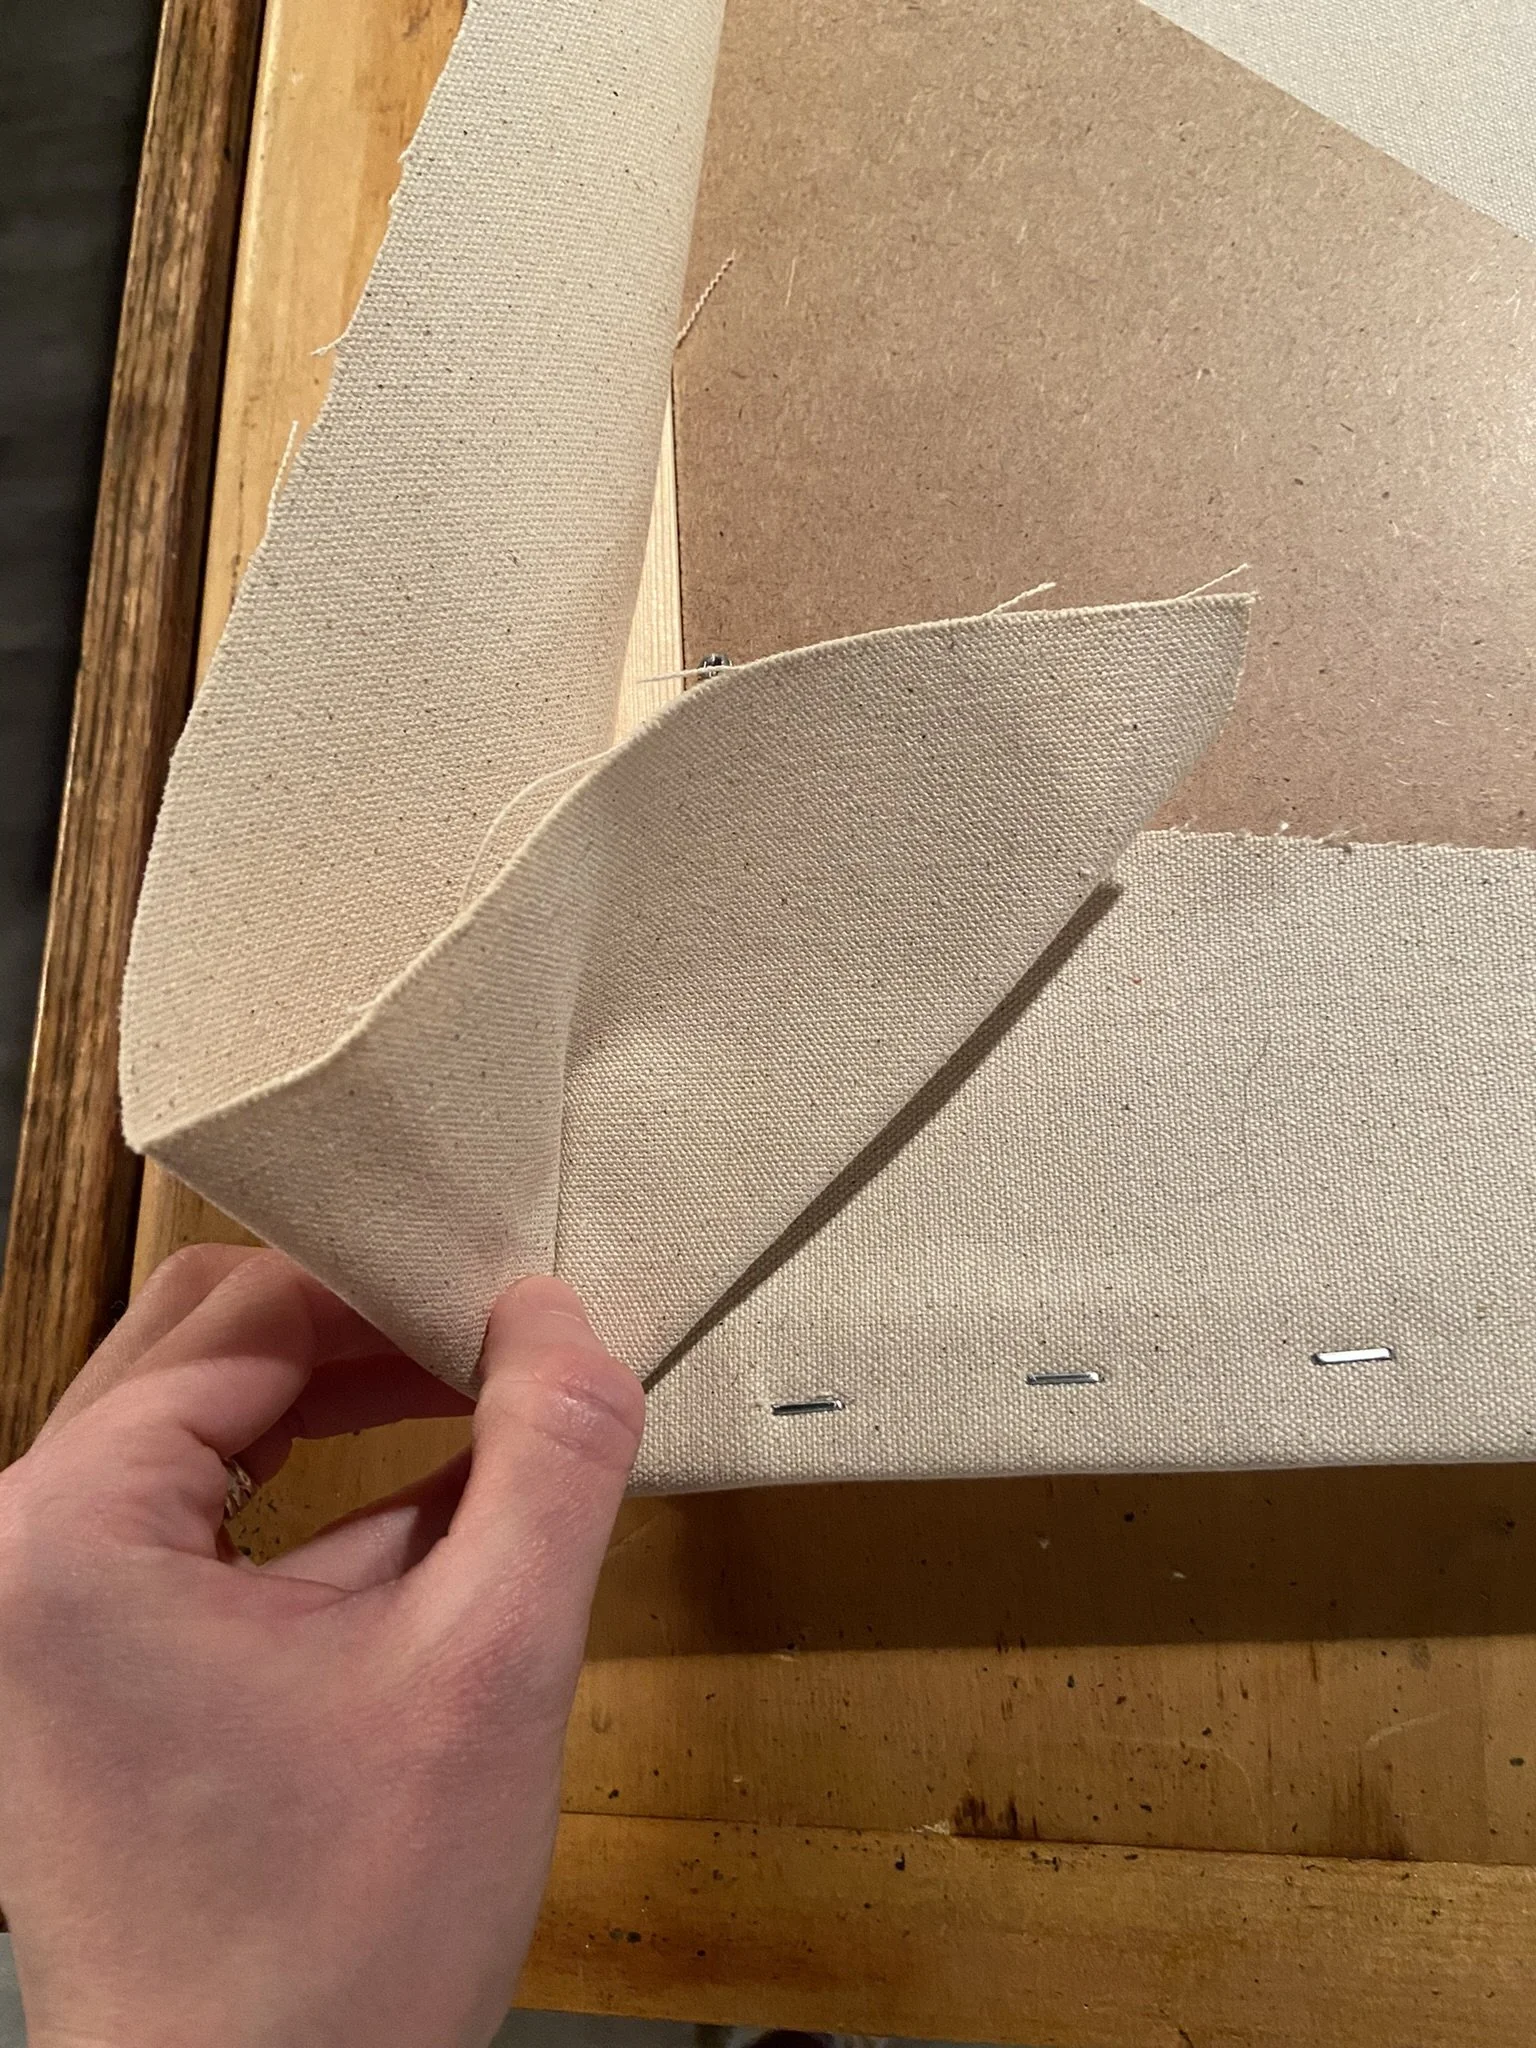
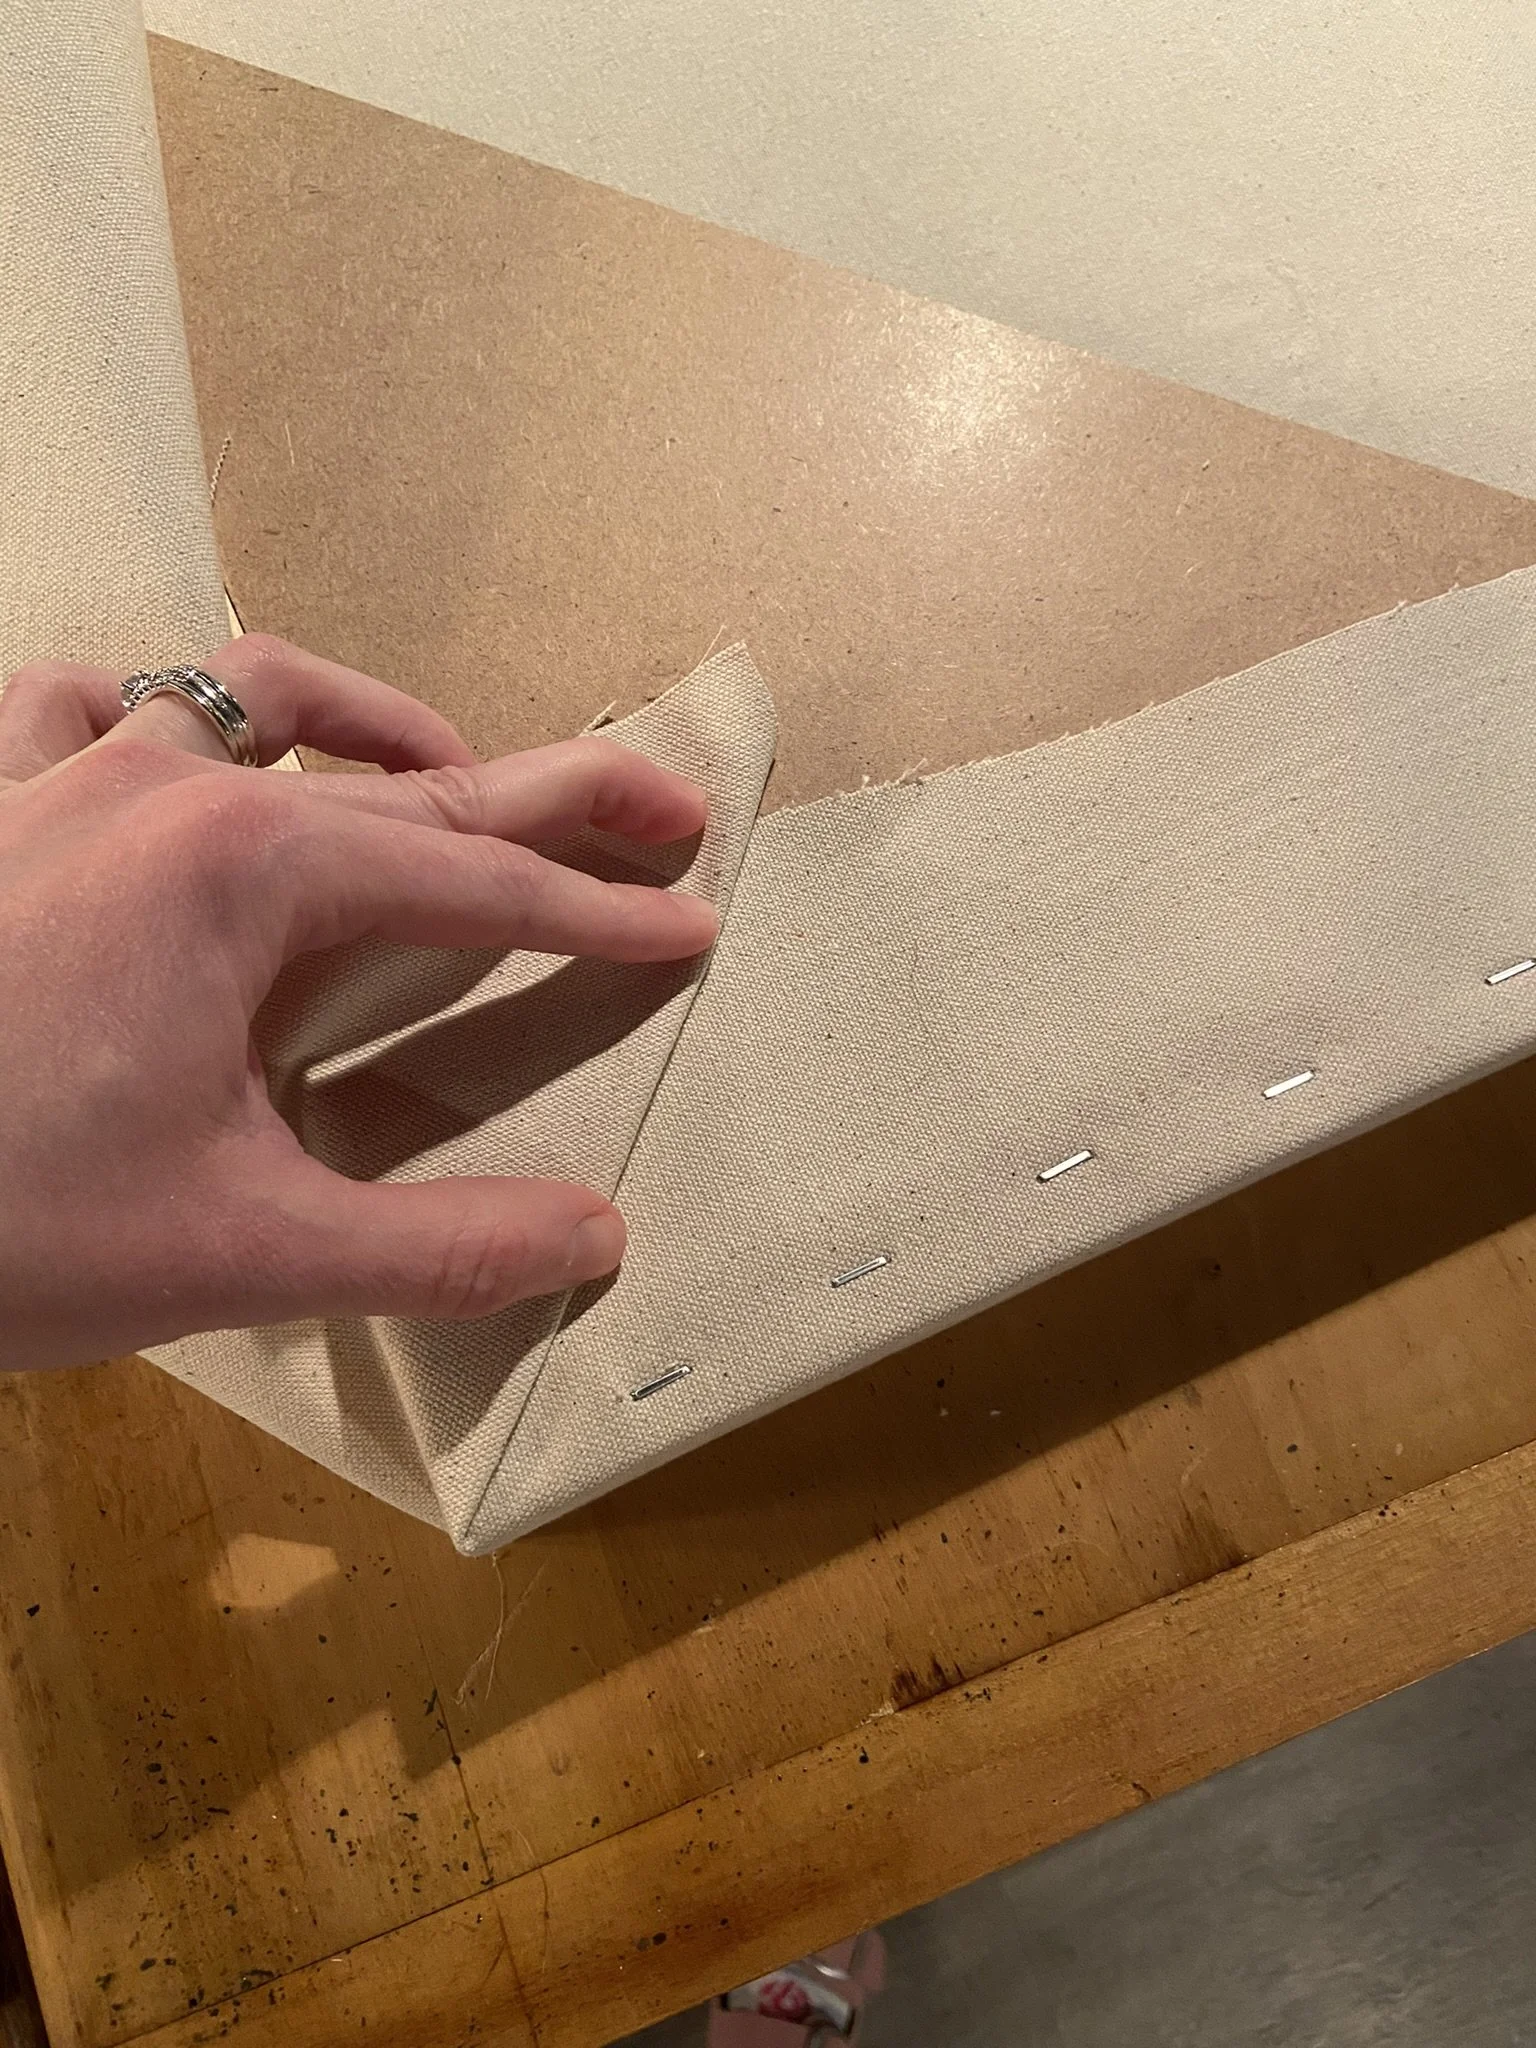
I then cut or tear the canvas into size, leaving enough on each side for a few inches to work with for stapling and stretching on the back of the stretcher frame. Using canvas pliers helps to pull and hold the canvas tightly. I then staple a staple or two on a side at a time, working on one side, and then the opposite, working outward until I reach the corners.

Once I reach the corners, it is time to fold them before stapling. I make sure to fold the flap toward the center of the canvas and create a triangular fold that falls just where the corner joints of the stretcher bars meet. I make sure the corner is smooth and folds are pressed firmly. When stapling over your folds, make sure to not staple over the joint of the frame, to leave the ability to stretch or expand the corners later if needed.

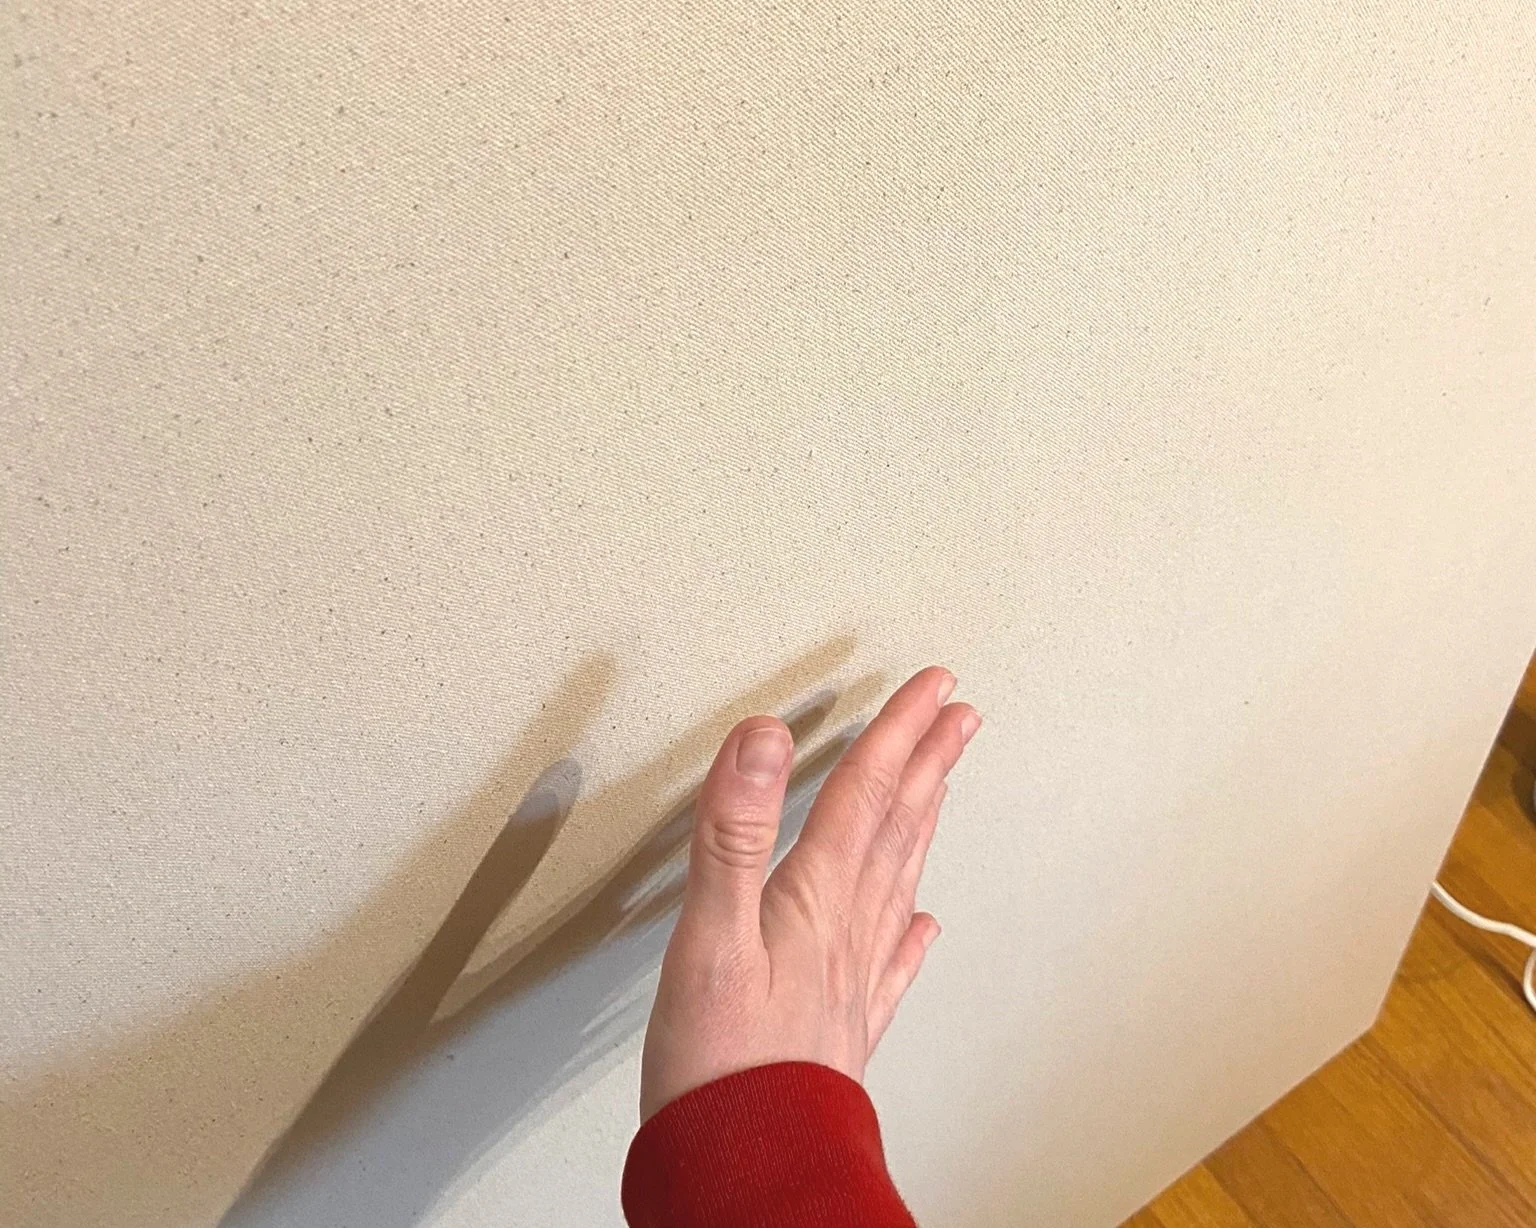
I always make sure to tap my newly stretched canvas to make sure it sounds like a hollow drum. I tend to do this periodically throughout the painting process, as things can loosen while I work.
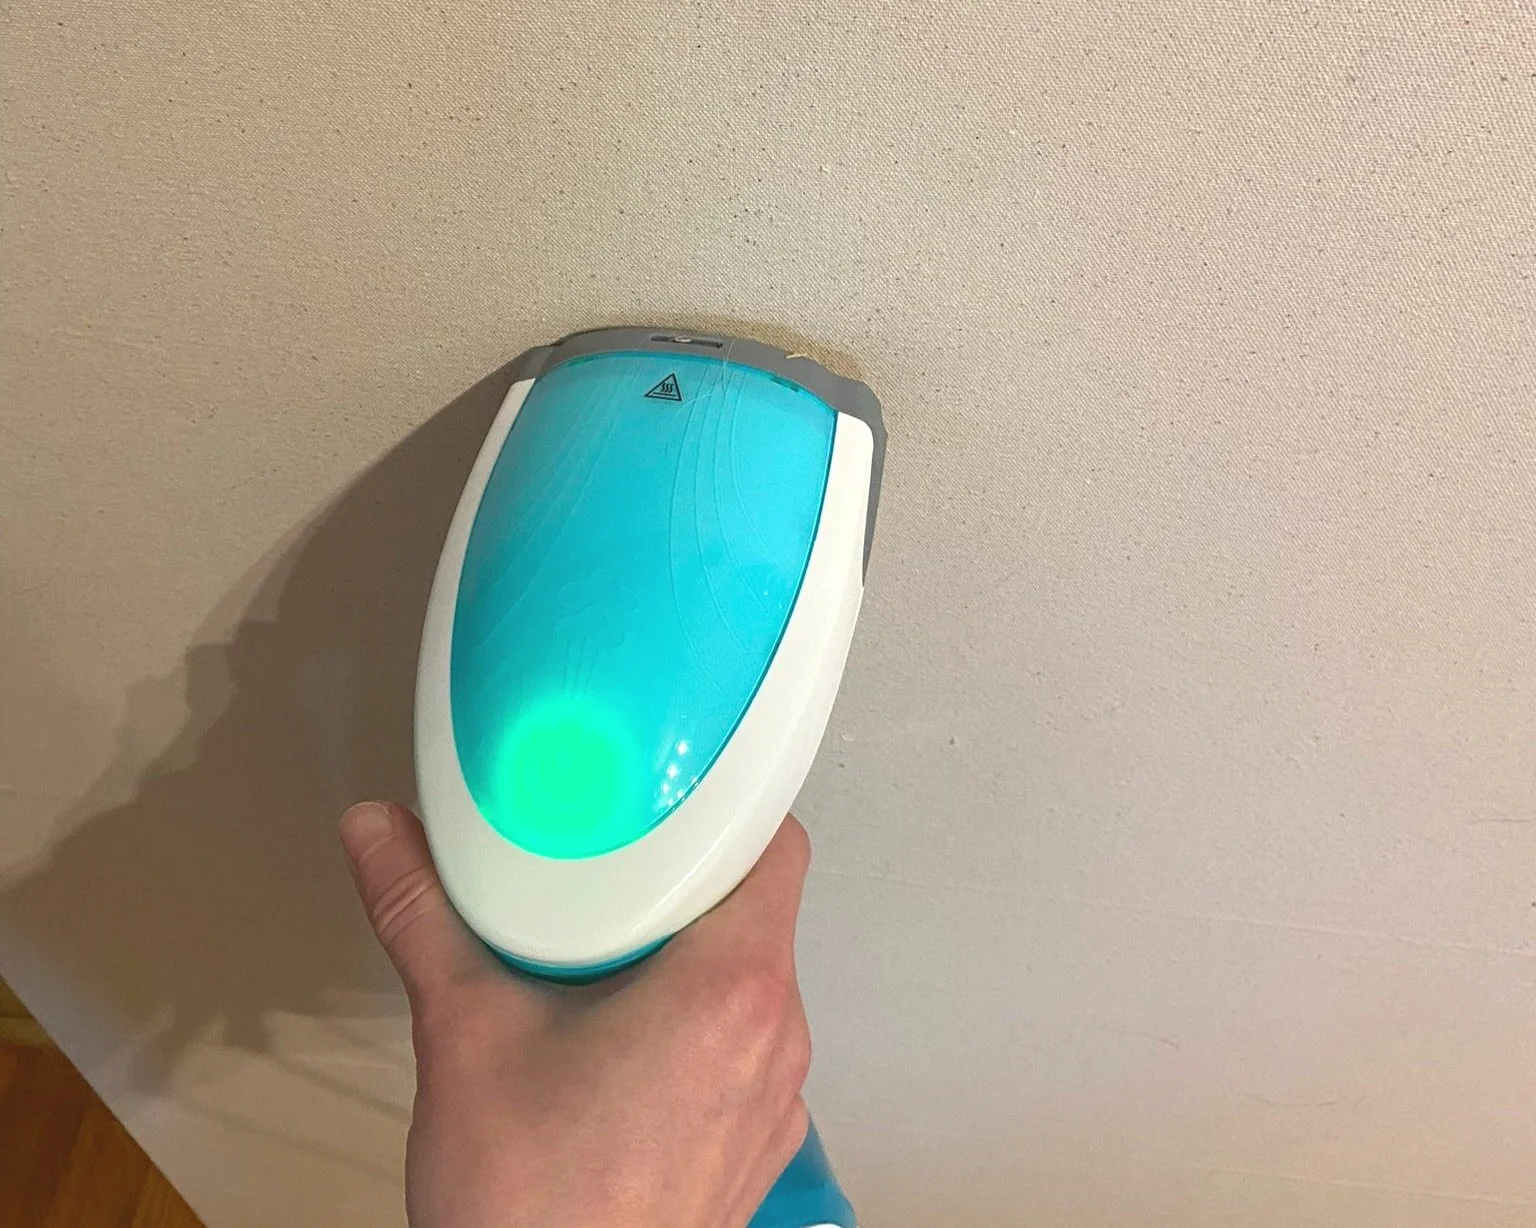
Once my canvas is fully stretched and stapled, I then run a steamer over the front and back to remove any leftover creases. I also run a lint roller over everything to remove any fuzz, dust, or hair.

Finally, I cover my canvas with a layer or two of clear or white gesso. Adding the gesso not only primes and helps to protect the canvas, but adds more tooth or texture to the canvas. I do not sand down or smooth the canvas after application. I prefer more texture.

I will typically dilute my gesso with a little bit of water. No more than 25% of it should be water. This allows me to spread it over the canvas a little easier without it becoming too thick.
Once the gesso has dried, over the next couple of days, I can begin to create my painting.